Overview
OnTheClock offers support for Thomson Reuters Accounting CS time clock hours, accrual benefits and tips/commissions submissions. To do this, OnTheClock creates a complaint time clock/payroll (xml) file in the format that Accounting CS expects. This help guide describes how to enable and begin using the Accounting CS export feature in OnTheClock.
Setup
To import time clock data into Accounting CS, a few things must be configured first. In a nutshell, adjusting settings will allow you to perform payroll plus enable time card import using the XML option. Below are the steps needed to allow Accounting CS to accept time clock data for employees.
Step 1: Locate the Client and click Edit
Step 2: Select Payroll Information Tab and select source ‘Time clock’.
Step 3: Locate Payroll Schedules section and select a Payroll Schedule.
Step 4: Click Save to apply change to Client.
Employee Settings
Step 1: Locate and click Setup->Employees menu
Step 2: Select an Employee and Client Edit
Step 3: On the Main tab, notice the Employee ID. This is how OnTheClock will uniquely identify an employee in Accounting CS when submitting time clock data.
Step 4: Next, confirm that at least on location has been added to the Locations and Departments Section. OnTheClock can classify time by location and department.
Step 5: On the Payroll Items tab, notice the Pay section. There should be at least one pay item displayed and included for the employee. Make a note of these Pay Item names for the OnTheClock setup.
Step 6: On the Accrual Benefits tab, ensure the necessary accrual benefits are enabled. This will be necessary if OnTheClock will be submitting Paid Time Off (PTO) hours to payroll. Make a note of these Accrual Benefit names for the OnTheClock setup.
The Accounting CS feature must be enabled in OnTheClock before the data mapping and export can occur. Doing this will allow you to adjust pay item names and display the Accounting CS export button on the time card screen.
Step 1: Sign into OnTheClock as an Administrator
Step 2: Click Settings->Timeclock Settings menu.
Step 3: Click the Payroll Providers tab and click Connect Account CS button.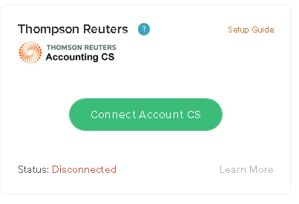
Step 4: After enabling Accounting CS, the following popup will be displayed. This is a reminder that time card columns in OnTheClock must be set up to match pay items names in Accounting CS.
Step 5: On the Advanced tab, notice the Timecard column export names. Timecard column names are equivalent to Pay Items in the Accounting CS software. Below are the default pay items that OnTheClock added for you. It commonly required to adjust time card column names to match your Accounting CS Pay Item list.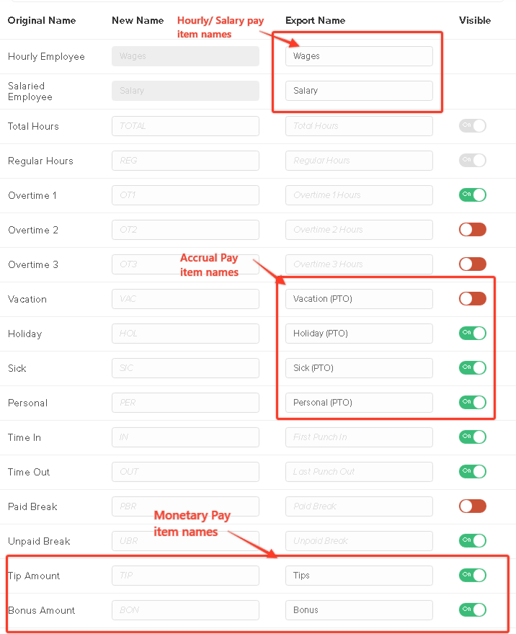

Step 6: Click Save button to update Settings.
Important Note on Locations and Departments
Accounting CS assigns a location to each employee automatically. It is important to set up a single location with the exact same name in OntheClock. OntheClock will use the first location in the list as the work location that is used when submitting timecards. We realize that some companies allow employees to work at multiple locations and that affects the hourly rate. We are working towards allowing an employee to specify their work location, however, currently, OnTheClock does not support that. Therefore, if there is a need for alternate hourly rates based on location, we suggest using Department switching in OnTheClock instead.
OTC – Getting the time clock file
Step 1: Sign into OnTheClock and Click the Timecard menu.
Step 2: Review employee timecards for accuracy.
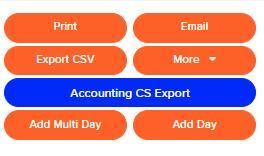
Step 3: Click the Accounting CS export button to download the time clock file.
Step 4: Accounting CS desktop program
Accounting CS – Importing time clock data
Step 1: In Accounting CS click Action -> Enter Batch Payroll Checks menu
Step 2: Select a Payroll Schedule from the list. You will need to specify a file directory where the time clock file can be found. Select the file from the list you wish to process.
Step 3: Now a summary of employee hours will be displayed. Clicking Continue button will bring the data into Accounting CS for further review.
Step 4: Now your back at the batch entry screen. Here you can review hours or proceed with payroll as normal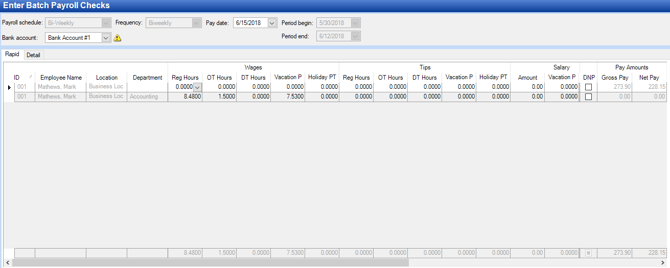
Understanding the XML Time Card File for Accounting CS Uploads
The XML file generated from OnTheClock contains your company’s time card data in a format that can be imported directly into Accounting CS. This file makes it easy to transfer employee hours, pay rates, and PTO usage without re-entering information by hand.
Understanding the XML Time Card File for Accounting CS Uploads
Each line of information in the XML file comes directly from your OnTheClock account. Here’s what each part means:
- Employee ID: The unique number assigned to each employee in OnTheClock.
- Pay Period Dates: The Period Begin and Period End match the dates you selected when exporting.
- Description: Indicates whether the employee is paid by Salary or Wages.
- Location: Your company name and internal company ID as stored in OnTheClock.
- Rate: The employee’s pay rate saved in OnTheClock (hourly or salary).
- Regular Hours: The total approved hours for the pay period.
- Accruable Benefit: (If shown) Lists any PTO, vacation, or sick hours used during the same period.
How This Connects to OnTheClock
When you export data to Accounting CS, OnTheClock gathers the time card details for each employee and builds the XML file automatically. Follow these steps to generate it:
Step 1: Log in as an Administrator or Manager.
Step 2: Navigate to Time Cards.
Step 3: Click the "Accounting CS" button.
Step 4: The XML file will download automatically, usually named something like CompanyName_TimeData_YYYY-MM-DD.xml.
How to Use the File in Accounting CS
Once your file is downloaded, follow these steps inside Accounting CS to import your employee time data:
Step 1: Open Accounting CS and go to Import Time Clock.
Step 2: Browse and select the XML file you downloaded from OnTheClock.
Step 3: Review the imported data to confirm employee IDs, hours, and rates appear correctly.
Step 4: Save or process payroll as usual.
Tip: If an employee’s data doesn’t import, make sure their Employee ID in Accounting CS matches the same ID in OnTheClock.
Common Reasons a File Might Not Import
- The pay period dates in Accounting CS don’t match the ones in the XML file.
- An employee’s name or ID number is different between OnTheClock and Accounting CS.
- The XML file was opened and accidentally modified before uploading.
- The file extension (.xml) was changed or renamed incorrectly.
Q&A
Q: How do I adjust the pay items to match between OnTheClock and Thomson Reuters?
A: When you connect your OnTheClock account to Thomson Reuters, the time card categories in OnTheClock will default to the pay items listed in Thomson Reuters.