Overview
OnTheClock makes it easy to run payroll. In this article, we’ll cover everything you need to know about how to enroll in payroll. Please note you must be logged into your account as an administrator. There are a few basic steps to enroll and get ready for running payroll:
- Enrollment — Enroll in the new Payroll tab and agree to terms & conditions.
- Provide business information — We need your legal company name and whether or not you have previous payroll history.
- Designate a company location — A physical address (location) for your employees is required to run payroll.
- Verify your employees — Ensure all paid employees are listed and update/verify hire and pay rates.
- Enter company signatory — This is the person authorized to sign tax and payroll documents.
- Consent and authorization - Agree to service terms and authorize OnTheClock to process payroll.
- Complete the initial setup — We will walk you through providing additional details about your business, such as desired first payday, bank account to use for paying your team, and your prior payroll provider information. These will be unique to you and your business's payroll needs.
- Enrollment Complete — That's it. After submitting your enrollment, you will be notified within two business days when your business is verified (or if we need any additional information). This step of the process assesses the complexity of your setup and ensures all required information was provided during enrollment.
Company Information
When you first created your OnTheClock time tracking account, we did not collect the legal name of your business. In order to process payroll, please enter your legal business name.

Please answer the question, "Have you ever run payroll for this company?" based on whether or not employees have been paid using the EIN for the company being enrolled. In simple terms, do you have pay history or are you staring a new company paying employees for the first time?
If you answered 'No', the system will ask you for your desired first payday and details on the pay period associated with that payday. Note: The system will not allow you to select a date within two weeks of the date you are enrolling in payroll.
If you answered 'Yes', the system will ask for desired first payday later in the enrollment process.
Company Location
For purposes of payroll, your employees need to be assigned to a physical location (Company Location) where they perform their job duties. This is important for tax purposes as it determines various tax obligations and considerations for both the employer and employee. Some considerations include:
- Employee state and local taxes to be withheld
- Employer state and local taxes to be withheld
- Potential for state tax reciprocity
- Employment tax reporting required by employers

After giving your location a name and entering address detail, you have the option to assign all employees to this location. Note: please use this option if you only have one company location. Otherwise, you will need to assign a company location to each employee in the next step of enrollment, Verifying Employees.
Verify Employees
The next step for enrollment is to verify (and enter) details for each of your employees:
- Work location
- Hire date
- Pay type (hourly or salaried)
- Pay rates

If you chose to assign the location to all employees from the previous step, the work location should be filled in already. If it is blank, or not correct, please enter the correct work location.
Enter or confirm the hire date for each employee and assign them as hourly or salaried.
Choose the pencil icon and edit the pay rate for each employee. All fields displayed must have a value.

NOTE: the purpose of this step is the initial creation of the employee profile in the payroll system using the employee records already in your OnTheClock time tracking account. You are being asked to add or verify hiree dates and pay rates, as those were optional fields in tracking time. They are necessary for running payroll and completing this steps starts the process of creating the payroll employee record.
After completing this initial verification of employees during enrollment, you will make any employee changes (like changes in pay) by editing the employee in the Employees tab.
Signatory Details
Enter in the contact information for the signatory, the person authorized to sign tax documents on behalf of the legal organization.

Agreement and Authorization
The final step of the enrollment process is to provide consent to our Service Terms and certify your authorization on behalf of your company.

Complete initial setup: Submit your payroll details
Based on your prior answers, the system will present and walk you through the rest of the information we need to verify your company and begin the setup process.
In this step of the process you will likely be asked to provide or validate a few details about your company: legal name, DBAs, industry, and tax structure. We use those to verify our ability to legally run payroll for your company.
Next, you'll be asked to provide details about your current payroll:
- Desired first payday using OnTheClock
- Pay frequency
- Verify how you currently run payroll (e.g., manually, through a provider, or bookkeeper)
- Current payroll provider
- Login or access information for the provider (we use this to run reports and accurately setup your account)
- Estimate of W2 processed last year and contractors paid (we use this to scope how long setup will take)
- Link to a bank account where we will withdraw funds to fund payroll
If you need support about how to answer these questions for your business, please reach out to our support team.

After providing this information, you will be prompted to submit your enrollment for verification.
Company Status
After submitting your information, your status page should look like the following:
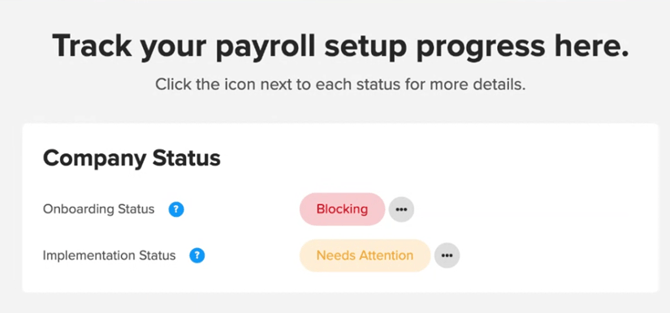
Your company status reflects whether or not OnTheClock has all of the company information to proceed with payroll processing. After your submission, we are validating your company's tax and location information to determine the appropriate tax documents to present to you for review and signature. Since it takes some time to verify this information, you are most likely listed as 'blocking.'
In some cases, we may need additional information. In those cases, OnTheClock will reach out via e-mail or phone to secure the necessary information.
These statuses will always show your company's readiness to run payroll. If at any point you need clarify on this information, please reach out to support.
Next, we'll look at finishing Payroll Onboarding, where OnTheClock completes all the necessary steps to migrate and audit your payroll history and account setup.